As a chronically blond person, I’m always looking for the next hair color trend or technique to enhance my highlights. No matter what the trend is, I have a few key requirements: an easy grow-out (I’m not a fan of a dark root line), low-maintenance upkeep (I prefer to keep my color appointments down to three per year), and a process that isn’t going to cause too much damage. I’ve tried everything from “hybrid” hair color to Barbie blond to Hailey Beiber-esque “smoky blond” – and now, I’m testing out “foilyage.”
Foilyage seemed like the perfect route to go down since I was looking for an ultra-bright blond to bring me into summer. I headed to Dell Miller, a master colorist at the LA outpost of Spoke & Weal Salon for my treatment. Keep reading to learn more about the process and see my foilyage results.
What Is the Foilyage Technique?
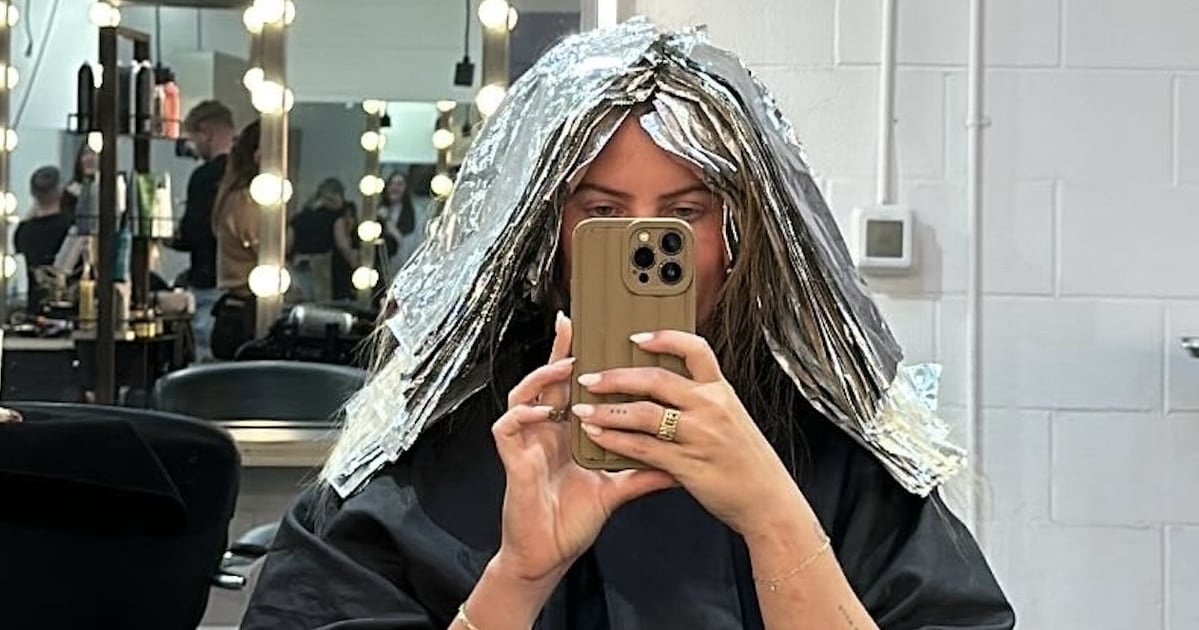
What sets foilyage apart from traditional balayage is how the color is processed. With traditional balayage, hand-painted highlights are left to process in the open air or wrapped in plastic wrap, whereas foilyage has the hair process under foils. “You use foil to encapsulate the hair color allowing more control, as well as brighter results,” says Miller. The use of foil also creates a warmer environment for the hair to process, which results in a slightly different effect than open-air balayage. Foilyage can be used to achieve pretty much any hair color and be done on any hair type, creating highly customizable color.
What Is the Process of Foilyage?
For my hair specifically, Miller started with a spritz of the (professionals only) K18 Peptide Prep Pro Chelating Hair Complex, which removes metal and mineral buildup for more even color. The process of foilyage itself is quite similar to a traditional foil. “Once you select your desired effect such as a weave or a slice, [your colorist] will then apply the product further down the hair and blending up toward the top stopping on the agreed-upon distance from the root,” Miller says. “You want to make sure that you are creating variation in your application to allow for a better grow-out. The greater the variation, the more dimension you create and the more natural the grow-out can be.” Miller created a “root shadow” for my color to give me a more natural grow-out. After my color was finished processing, we headed to the sink for a toner. We actually did two rounds of toning to get my hair to get any residual overly-yellow pieces to fall in line.
My Foilyage Results and Maintenance
“The great thing about foilyage is that it allows you a few extra weeks before needing to return to the salon for a touch-up,” says Miller. “It all depends on the desired results and how close or far from the root you allow. It can range from eight weeks all the way to 16 weeks.” For a blond as bright as mine, Miller recommends investing in a filtered showerhead like the Jolie Filtered Showerhead ($165) to keep the buildup of minerals at bay. I’ve found that for ultra-highlighted blond, a routine that prioritizes heat protection and hydration works best. My go-to’s are the Virtue Labs Recovery Shampoo and Conditioner Duo ($73), a once or twice-a-week wash with the Ouai Detox Shampoo ($32) paired with a deep-conditioning mask like the JVN Nurture Intense Hydration Hair Mask ($34), and a few drops of OGX Renewing + Argan Oil of Morocco Penetrating Hair Oil Treatment ($10) on my ends overnight.
Aviel Kanter is the director of branded content for Vox Media and oversees lifestyle content across the portfolio of brands. She manages a team of editors who write articles in the wellness, fitness, beauty, fashion, health, entertaining, pets, and finance categories. She is also a beauty enthusiast and contributes many articles to the POPSUGAR Beauty editorial site.
