Stars are having a moment. (They are the *star* of the fashion and beauty industries if you will.) We’ve seen Halle Berry sport a dainty star manicure, watched the velvet star nail trend skyrocket on social media, saw chrome star nails on all our favorite celebrities, and even witnessed the five-point star shape become the go-to spot treatment for acne and walk down the runway.
As for the source of the fixation, we’re blaming it on the Y2K resurgence and astrology’s unstoppable cultural renaissance. And frankly, we’re on board. Of all the nail trends to come out of the star’s recent resurgence, layering the design over a French manicure is our favorite way to try the trend. Ahead, we break down the starriest rendition of the French manicure, how to create it yourself, and which products to buy if you want to DIY.
What Is a Star French Manicure?
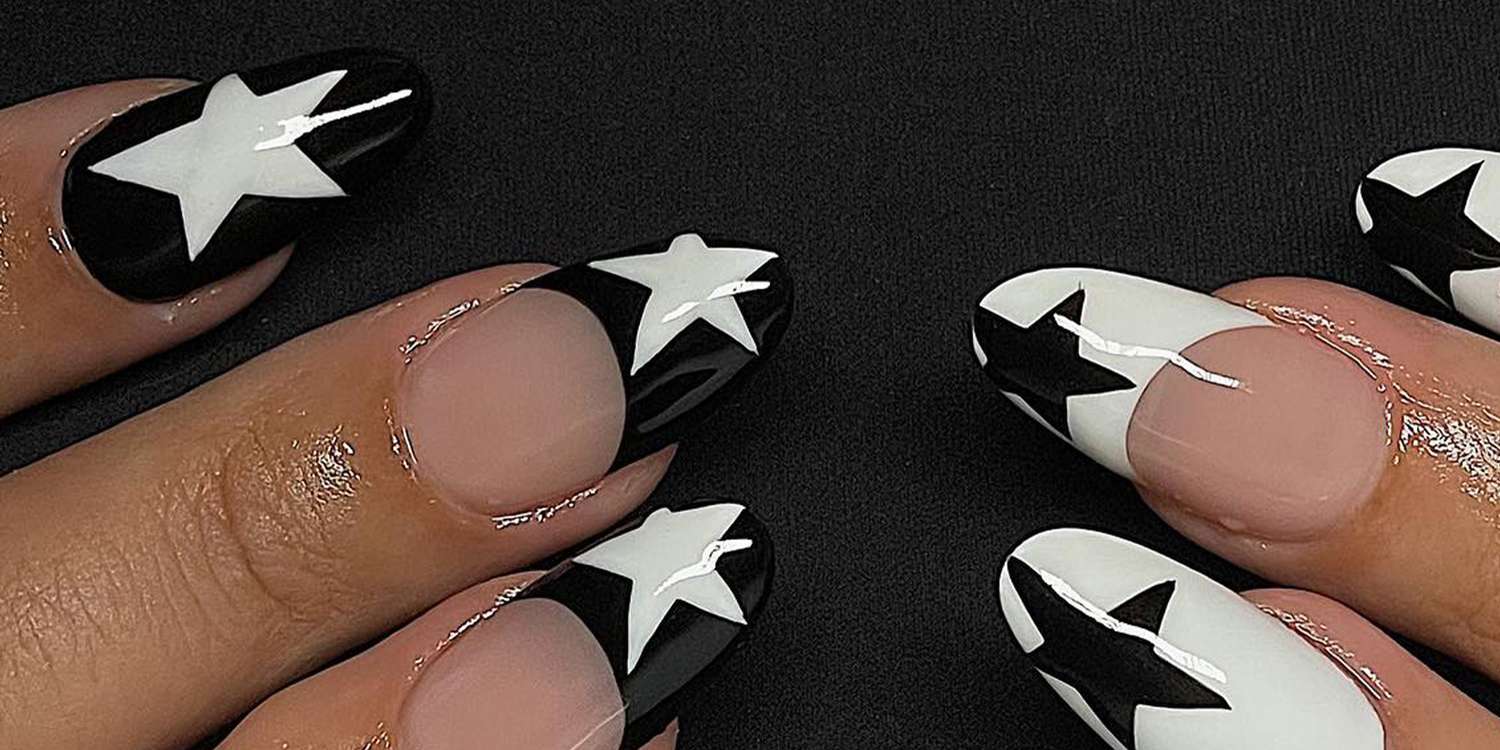
The trend is exactly what you would expect: French tips with stars on top. Though, not just any star will do—these manicures use oversized stars that reach from the tip of the nail to the middle or even the bed of the nail, always with a certain italicization of the star reminiscent of the 2000s biker aesthetics.
Of course, the go-to style is black and white, usually with a classic white French tip and contrasting black star. The inverse is also just as popular, and nail artists have regularly done one hand one way and the reverse on the other.
However, the trend isn’t limited to just gray-scale colors. Whatever color you love the most can easily be swapped in for black or white. It is also easily combined with a number of other trends like chrome nails, gold foil nails, dewdrop, and gem-encrusted.
@myprettyset/instagram
How to Create the Look
Going to the nail salon is your best bet at achieving a picture-perfect star French manicure, as creating the star requires thin-tipped brushes, attention to detail, lots of practice, and just as much patience. Not to mention, getting a clean-cut French tip can also be just as difficult to achieve on your own unless you are a nail pro. Nonetheless, if you feel like you have the star power to pull off creating the look yourself, we got you covered with the step-by-step.
Like any manicure, a good-looking result requires proper nail care. So, to start off, you will want to remove any polish currently on your nail and file them down to your desired length and shape. Most French manicures tend to be short and square-shaped or almond, though whatever you like works too. Then, gently buff your nail bed—with something like OPI Edge White 240 Grit File ($2)—to get a smooth canvas for the polish and apply cuticle oil to soften your cuticles and push them back.
@disseynails/instagram
Now we are ready for some color. Star French tips require three colors: one for the base, one for the tip, and one for the star. The first step, of course, would be going in with your base color. If you are doing a more classic French, this is going to be a natural shade like OPI Natural Nail Base Coat ($11), though any color will suffice as this is not your average French mani.
With your base coat applied and dried, you can now go in with the tip. If you lack a steady hand, using tape is the best way to achieve an even, straight-edge tip. You can spend $9 on nail tape or just use the tape stashed away in one of your desk drawers—it all works the same. With your tape in hand, place it directly on your nail just below where you want the tip to end. If you are going for a more natural look, apply it with the curve of your nail, though a straight edge is just as stylish. Then, of course, we add polish. Apply your tip color with no more than two coats using something like OPI Alpine Snow ($11) or Akzent Luxio Polar ($17) for a classic white. This is also where the fun starts to happen, and any color flies. Chrome, pink, black, blue—seriously, you do you.
Then, the star. If, up until now, making your French tip was a piece of cake, making the star might pose more of a challenge.
First, you will want to take a thin, fine-point brush and dip it in the color of your choosing. Then, create the outline of the star on your completely dried French tip. You will want to start somewhere near the edge of the tip and extend each of the star’s points so they are even and reach the middle of your nail. Once outlined how you like it, fill in the shape of the star with no more than two coats. You can also go in with smaller accent nails, add crystals to the mix, or use the star as an accent nail amongst a mismatched mani.
Finally, once your base, tip, and star color are dry, you will want to apply a sheer top coat like Akzentz Luxio Shine On ($20) to keep it locked in place and perfect. Of course, any of these steps and product recommendations can be altered based on the colors and shape you desire most or whatever your nail artist has in their station.